How to Change the Active Language
Description
Learn how to change the active language in an application at runtime.
Discussion
A common feature on a number of websites and applications is to have a dropdown list where the user can select the language that information is displayed in. This example will show how to do this.
This technique requires the ability to connect to the server and therefore does not work in offline applications. See Multi-Language Support in a Cordova Mobile App if you need to set the active language in an offline application.
Create a Text Dictionary Table
In the Web Projects Control Panel click on the Project Properties button in the panel toolbar.

Scroll down to and expand the 'Text Dictionary Table Settings' section. Click on the
 button next to the Connection string property.
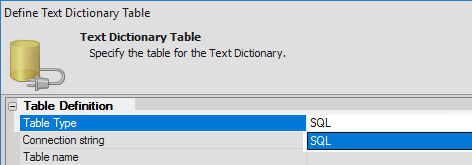
Set the Table Type to SQL
Click the
button next to the 'Connection string' property and create a connection string to the Northwind database.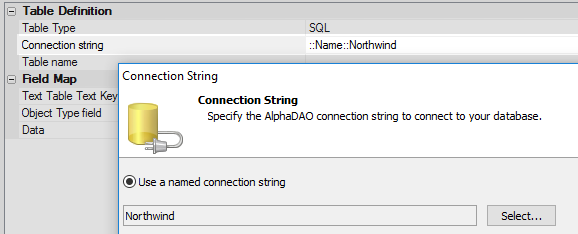
Type the name of the Table you wish to create in the 'Table name' property, in this can 'Language Dictionary'. As this is a new table you can simply type the table name into the textbox next to this property.

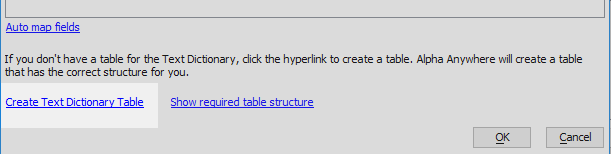
Click the 'Create Text Dictionary Table' button at the bottom of the 'Define Text Dictionary Table' dialog. A message should be displayed stating that the table was created. Click OK and OK again.
Create Controls that use Text Dictionary Tags from the Table
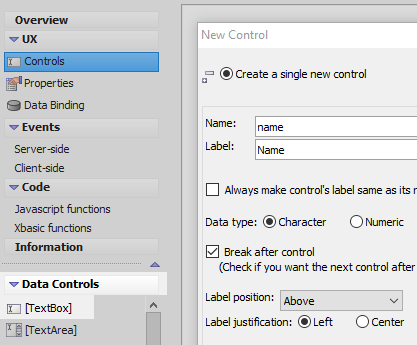
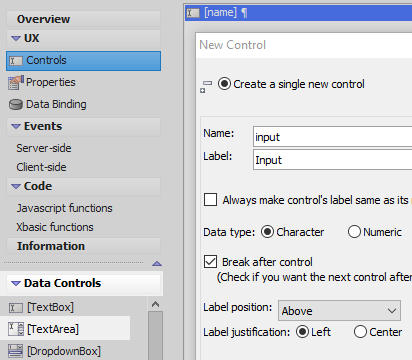
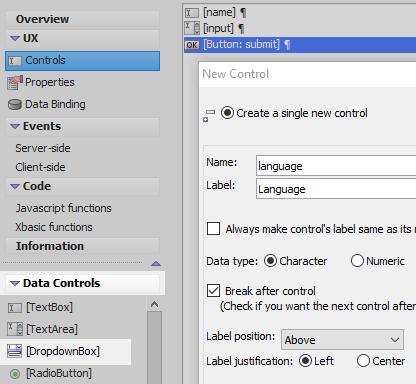
Create a new UX Component. In the UX Builder on the UX Controls page open the 'Data Controls' menu. Click on the TextBox option to add a textbox control to the component. Give the text box control the name and label 'name'.
Go back to the 'Data Controls' menu and click on the [TextArea] option to add a text area control to the component. Give this control the name and label of 'input'
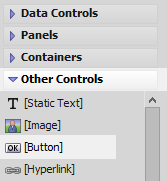
Open the 'Other Controls' menu and click on [Button] to add a button control to your component.
Highlight the button control. In the properties list on the right change the 'Button text' property to read 'submit'.

Add the Text Dictionary Tags
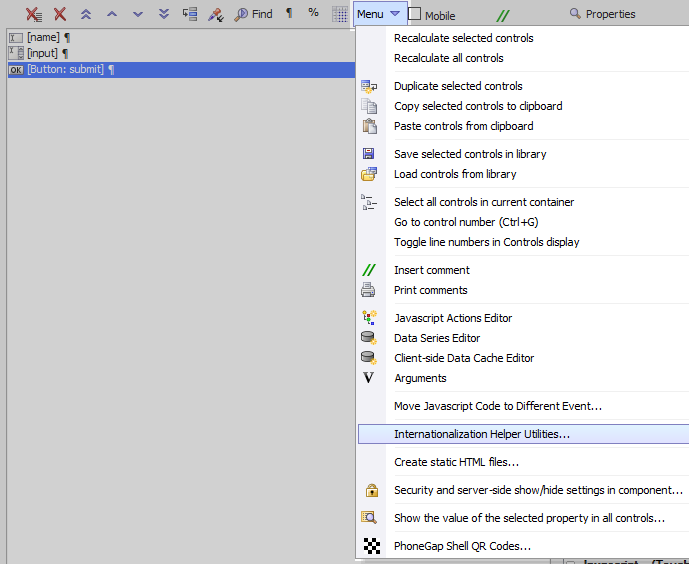
In the UX Controls page click the 'Menu' dropdown in the toolbar to open the Additional Options Menu. Select the 'Internationalization Helper Utilities' option.
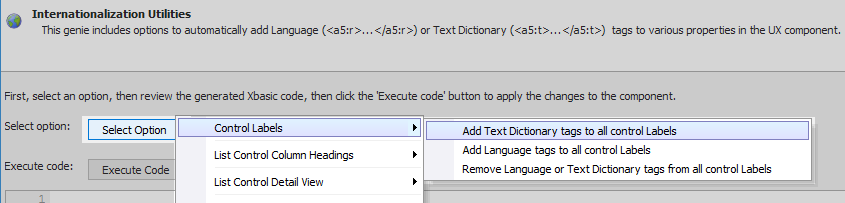
In the helper dialog click the 'Select Option' button, choose 'Control Labels', and then click 'Add Text Dictionary tags to all control Labels'.
The control labels you defined should appear with <a5:t></a5:t> tags around them. Click the 'Execute Code' button.

Click the 'Select Option' button again, choose the 'Button Controls' option, and click add Text Dictionary tags to all control Labels'.
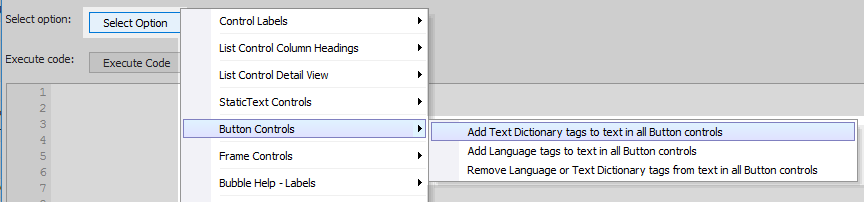
Click the 'Execute Code' button and close the 'Internationalization Helper Utilities' dialog.

Add Language Definitions to Each Tag
In the UX Builder on the UX Properties page scroll down to the 'Other' properties section. Click the
button next to the 'Text dictionary tags' property.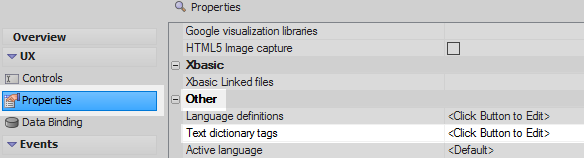
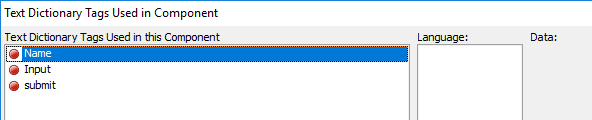
In the 'Text Dictionary Tags Used in this Component' list highlight the 'Name' tag.
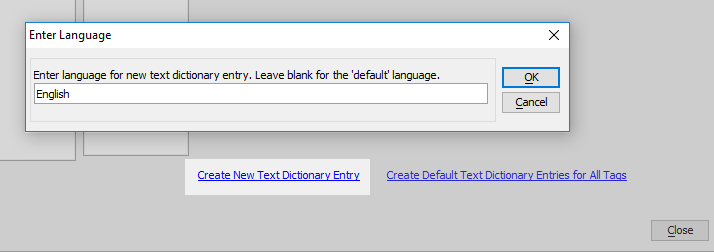
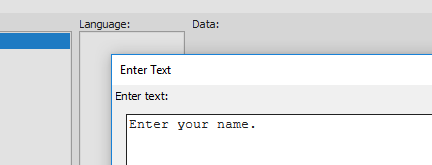
Click the 'Create New Text Dictionary Entry' button define the language as 'English'
Enter some text into the 'Enter Text' dialog to define the value of the name control for the English language. Type something like the following and click OK
Enter your name.
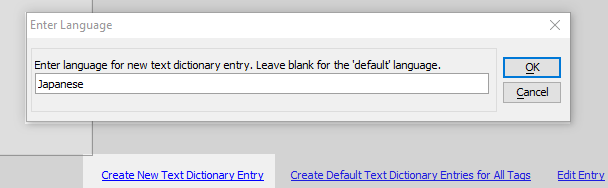
Click the 'Create New Text Dictionary Entry' button a second time. Enter the name of a second language entry that you want to define. Here we will put 'Japanese'
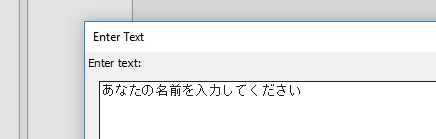
Define some text for the second language and click OK. This can be cut and pasted from some other text; for example, from [Google Translate].
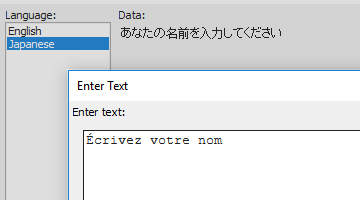
Click the 'Create New Text Dictionary Entry' button a third time. Add a third language to the 'name' tag, like French.

Define the text for the third language.
Highlight the 'Input' tag in the 'Text Dictionary Tags Used in this component' list.

Add the English, Japanese, and French languages to the 'Input' tag, defining new text for each language in the same way as you did for the name tag.

Do the same for the 'submit' tag.

Create a Dropdown List With Options
On the UX Controls page open the 'Data Controls' menu. Click on the [DropdownBox] option to add a drop-down control to the component. Give it the name and label 'language'.
Highlight the drop-down box in the controls tree. In the properties list on the right click the
button next to the 'Choices' property in the
DropDownBox Properties section.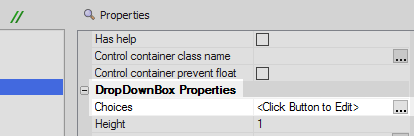
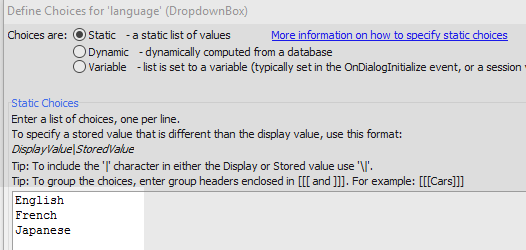
Select the 'Choices are: Static' radio button.

For the Static Choices definition list the language options that are present in the text dictionary you defined. Then click OK
English
French
Japanese
Use an Ajax Callback to Make the Dropdown Set the Active Language
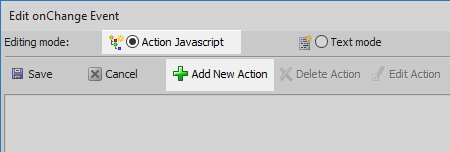
Highlight the dropdown box you defined on the UX Controls page's controls tree . In the properties list on the right, scroll down to the 'Javascript' section. Click the
button next to the 'onChange' property.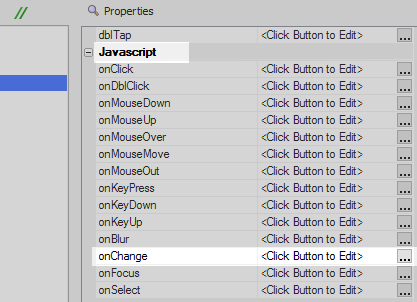
From the possible editing mode options select the 'Action Javascript' radio button. Click the 'Add New Action' button.
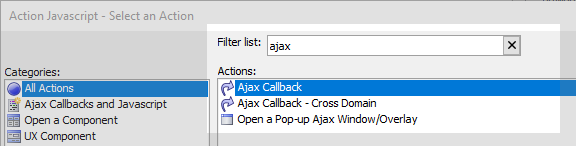
Type 'ajax' into the 'Filter list' textbox control and select the 'Ajax Callback' action in the 'Actions' list. Click OK.
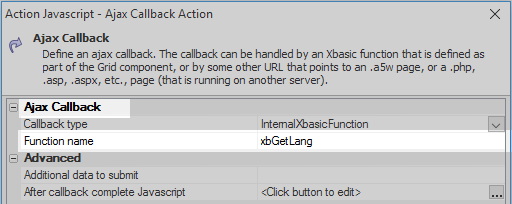
In the Ajax Callback's properties list that opens set the 'Callback type' property to 'InternalXbasicFunction'.
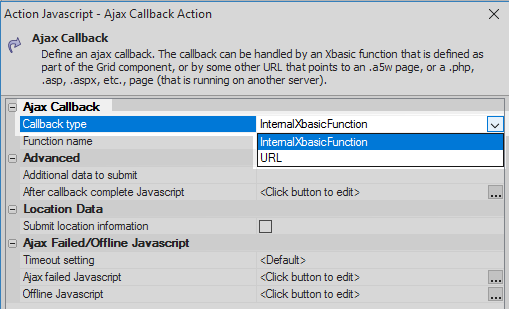
In the Ajax Callback section set the 'Function name' property to be 'xbGetLang'. In the following steps we will define this function. Click OK and Save.
Open the 'Code Xbasic functions' page from the main menu and define the xbGetLang function as follows.
function xbGetLang as c (e as p) session.__protected__activeLanguage = e.rv.V.R1.LANGUAGE 'Return JavaScript to reload the page dim js as c =<<%js% window.location.reload(true); %js% return js end function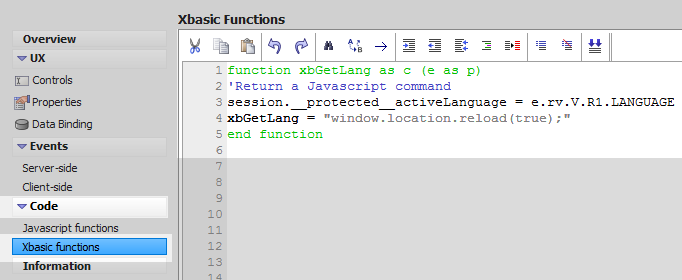 Here 'e' stands for 'event', 'rv' for run-time variable, r1 for 'row 1', and 'LANGUAGE' is the variable that points to the 'language' field in the SQL table that you can create in Alpha Anywhere for text dictionary tags. The table has three fields: key, language, and data.
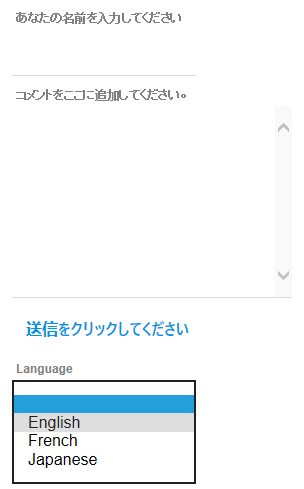
Run the component in Live Preview. Click the dropdown to change the active language.
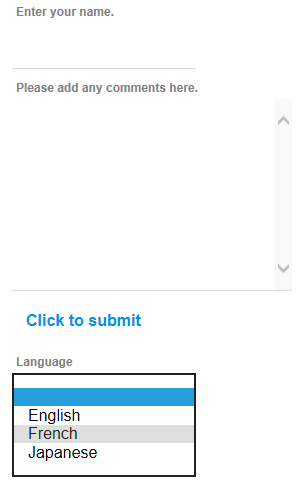
The language should change, make another selection...
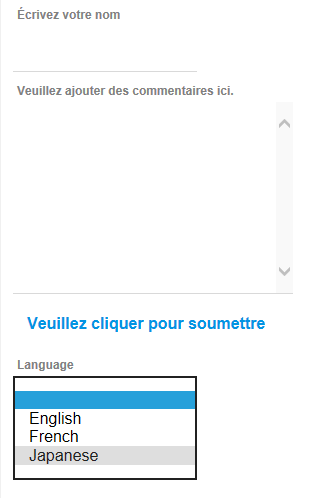
Result:
 You could easily add a language tag for the dropdown control as well using <a5:t></a5:t> tags.
See Also